Create a Profile
In SessionPod, each independent browser environment is called a Profile. Each profile has fully isolated cookies, local cache, browsing history, bookmarks, and other data.
A browser profile works like an independent task workspace. You can create dedicated browser profiles for different tasks.
This guide explains how to create a new browser profile.
Steps
Step 1: Open the new profile window
- Launch the SessionPod client and sign in to your account.
- Click Profile Management in the left navigation bar.
- Click the Create Profile button in the upper-right corner.
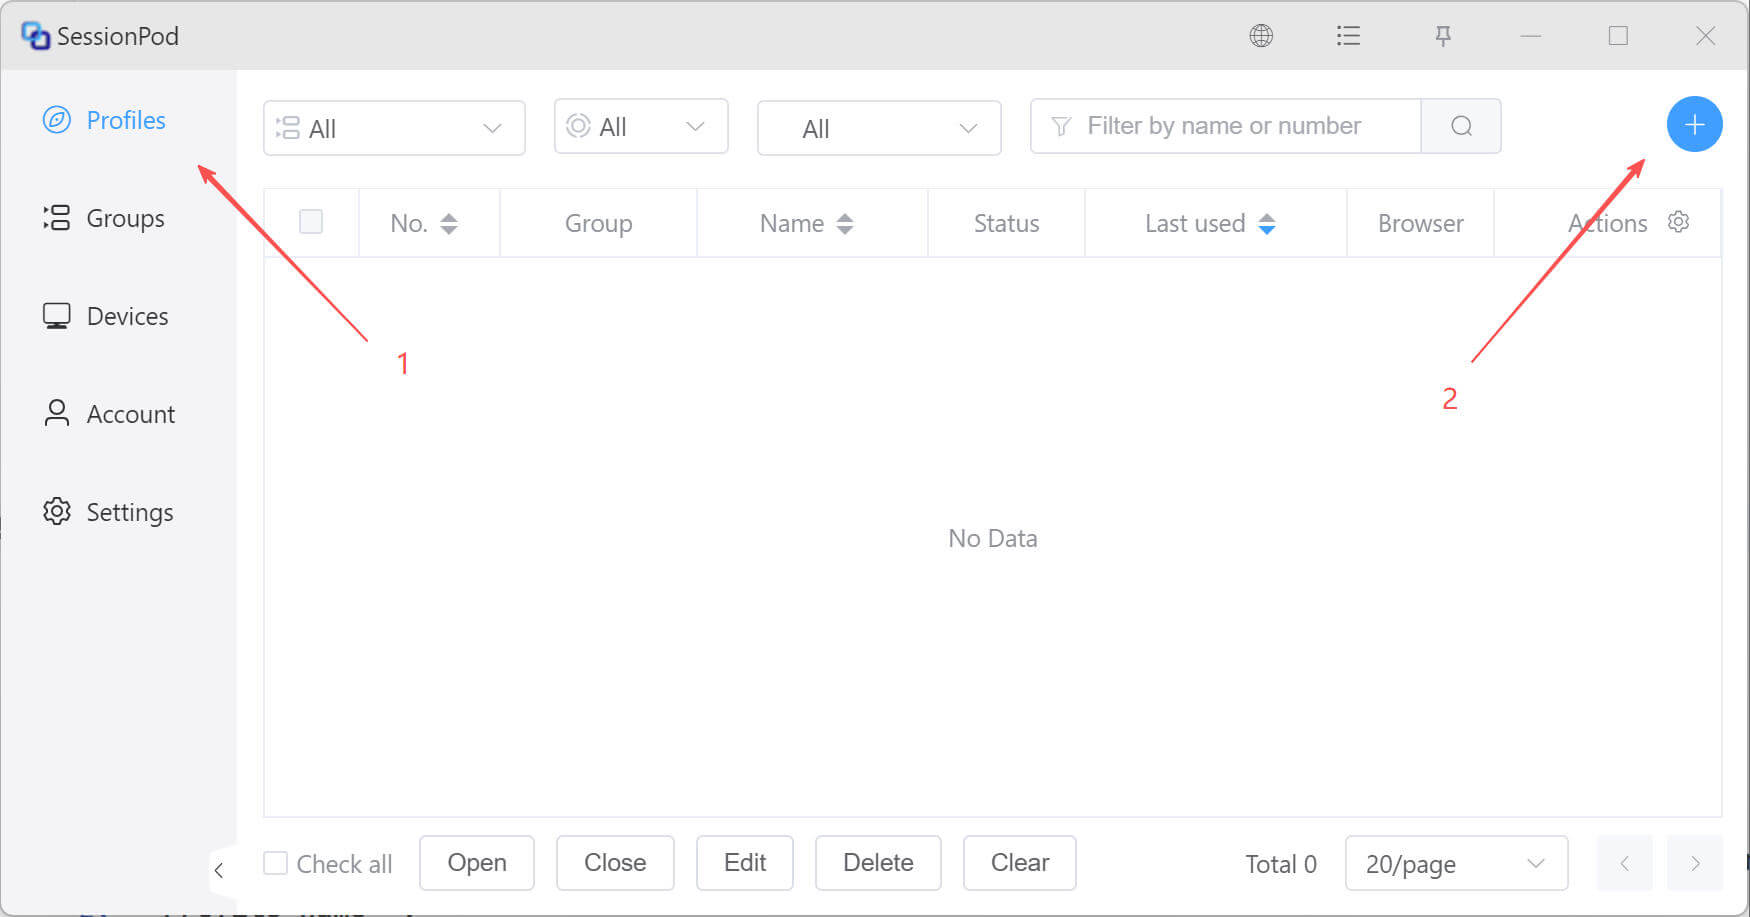
Step 2: Configure profile information
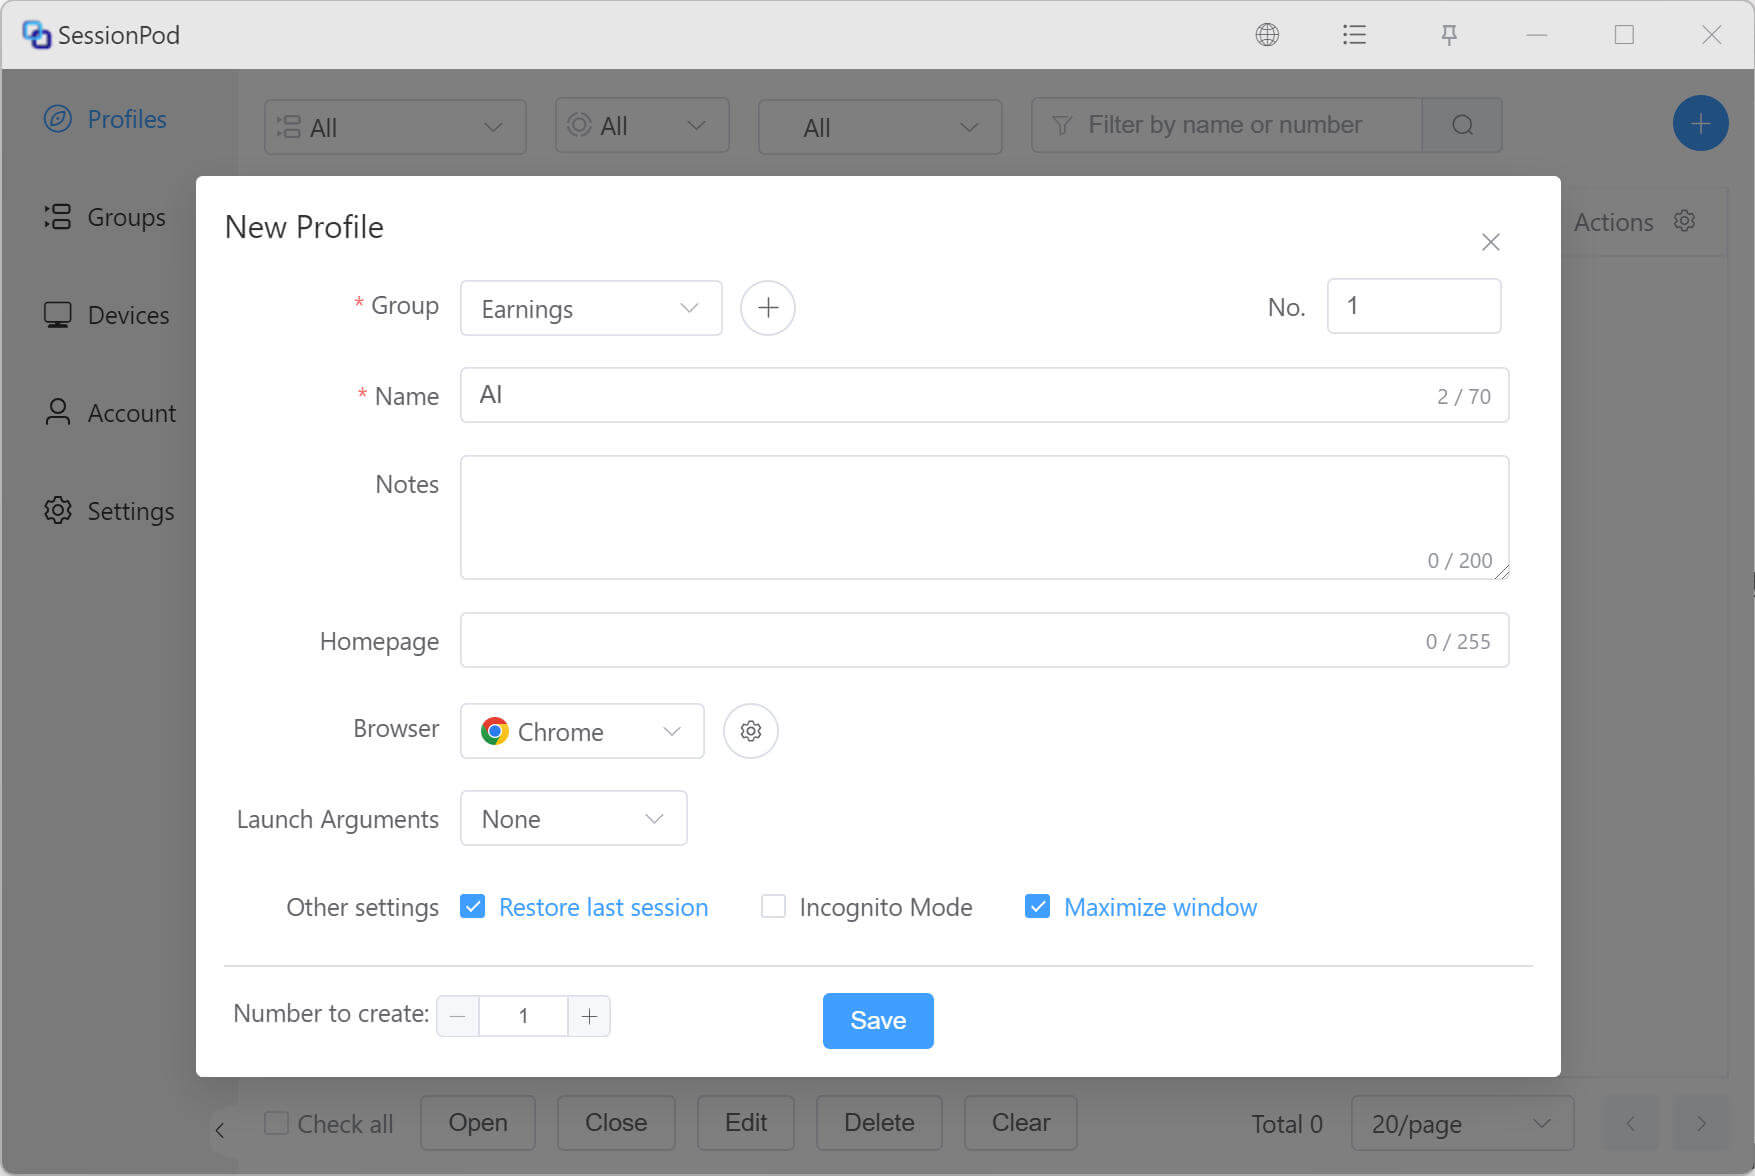
In the New Profile window, fill in or select the following key options:
- Group:
- Assign the profile to a specific group, such as
WorkorTravel, for easier filtering and batch management later.
- Assign the profile to a specific group, such as
- Name:
- Enter an easy-to-recognize name, such as
StocksorShopping.
- Enter an easy-to-recognize name, such as
- Browser:
- Choose a browser based on your preference, such as
ChromeorBrave. This setting cannot be changed after the profile is created.
- Choose a browser based on your preference, such as
- No.:
- The ordering number increases by 1 by default each time. You can customize it as needed, and sort the profile list in ascending or descending order.
- Notes (optional):
- Add a description or usage note for this profile.
- Homepage (optional):
- Set the initial page URL opened when the browser starts, for example: https://facebook.com.
- Launch arguments (optional):
- Command-line arguments passed to the browser at launch. Developers may use this option; most users do not need to configure it.
- Restore last session (optional):
- When enabled, the browser automatically restores the previous session state after restart, including open tabs and window layout. This helps improve productivity by quickly returning to your previous workspace.
- Incognito mode (optional):
- Incognito mode is a temporary browsing session. Pages visited, search history, cookies, and site data from the incognito window are not saved to local browser history after all incognito windows are closed.
- Maximize window (optional):
- When enabled, the browser starts maximized every time.
Step 3: Save and launch
- After checking that all settings are correct, click Save in the lower-right corner.
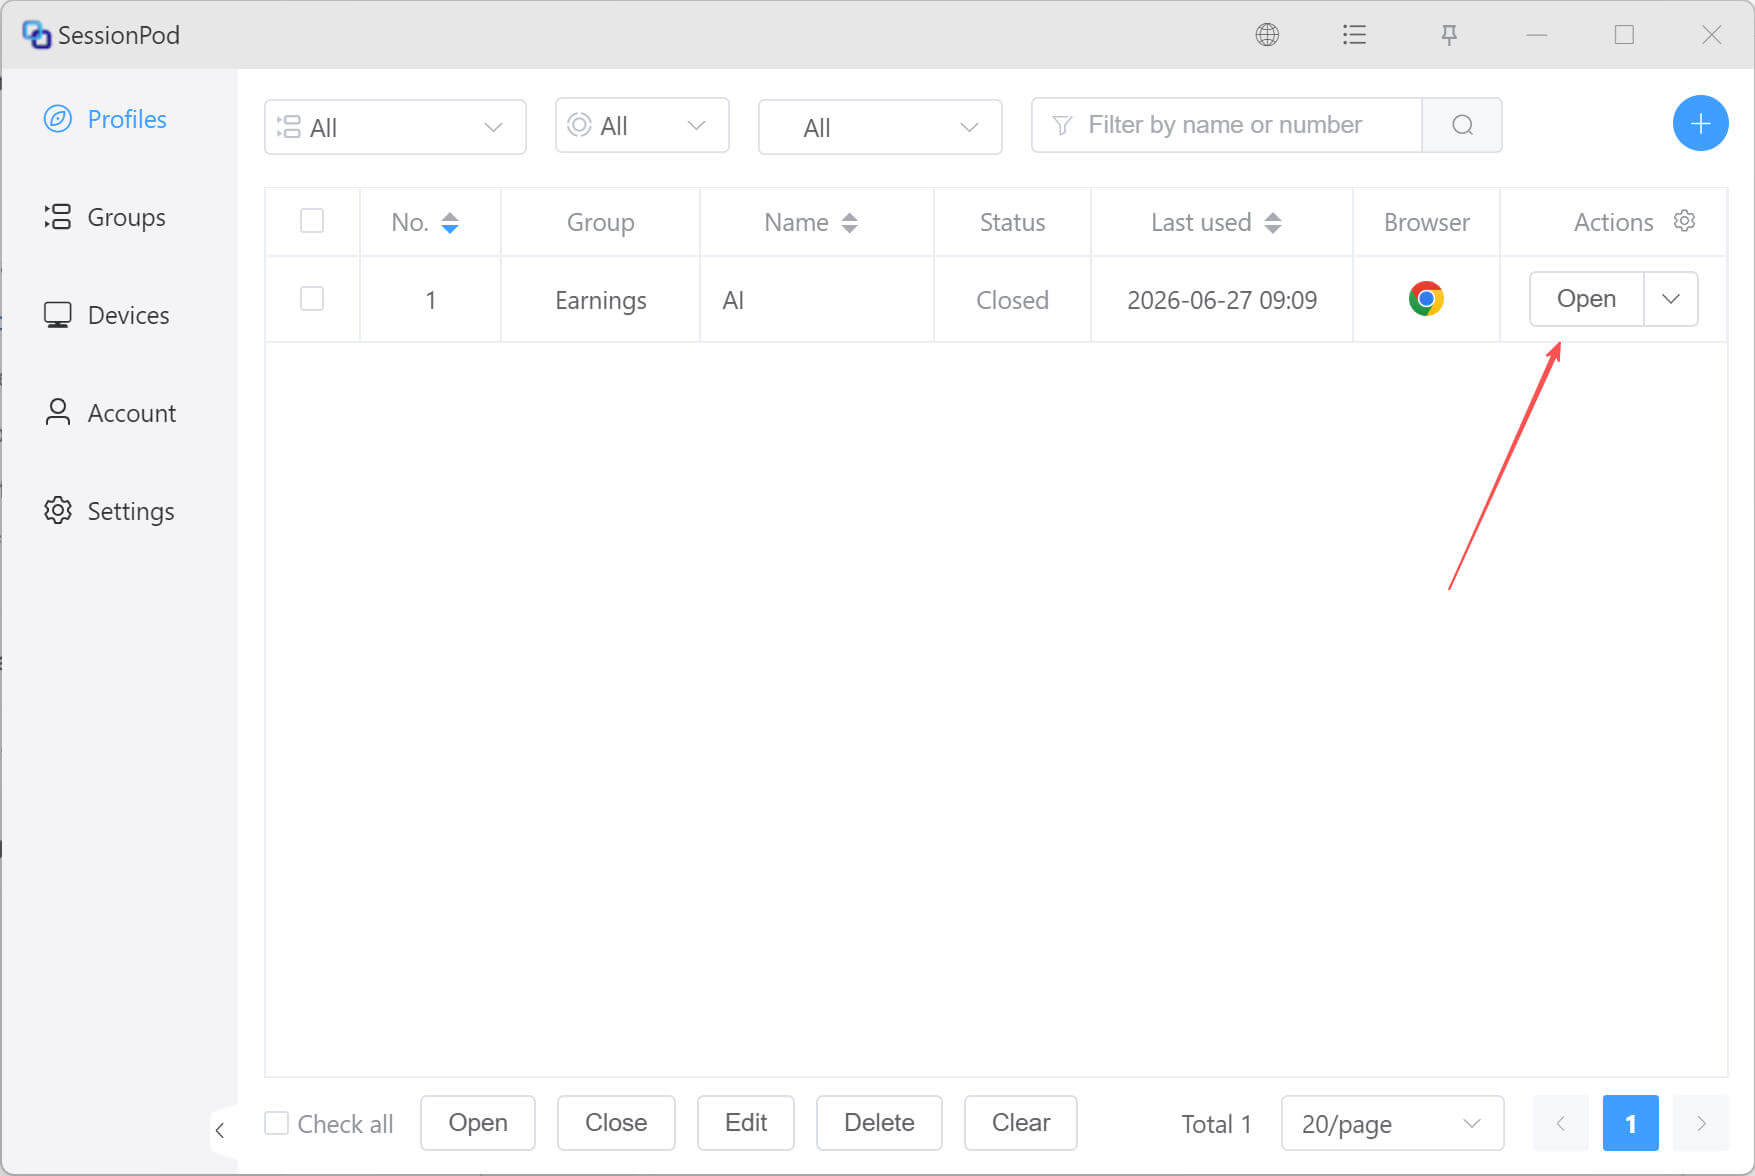
- After the profile is saved, it appears in the profile list.
- Click Open on the right side of the profile entry to open a dedicated, fully isolated browser window.